

Windows 11 has a system called DirectX Shader Cache. Like any other cache, it stores shaders created by the graphics unit used on the PC. It helps render images and videos faster, and the program(usually a resource-intensive game) corresponding to those images and videos can load swiftly.
DirectX Shader Cache is crucial to improve gaming apps’ loading and overall performance. Sometimes, this cache system stores corrupt data for a long time. That will cause the graphics of the games to load slowly.
Then, the need to clear the DirectX Shader Cache arises to improve the loading time of resource-intensive apps on Windows 11. This guide explains two common methods for deleting the DirectX Shader Cache in Windows 11.
Clear DirectX Shader Cache from Windows Settings
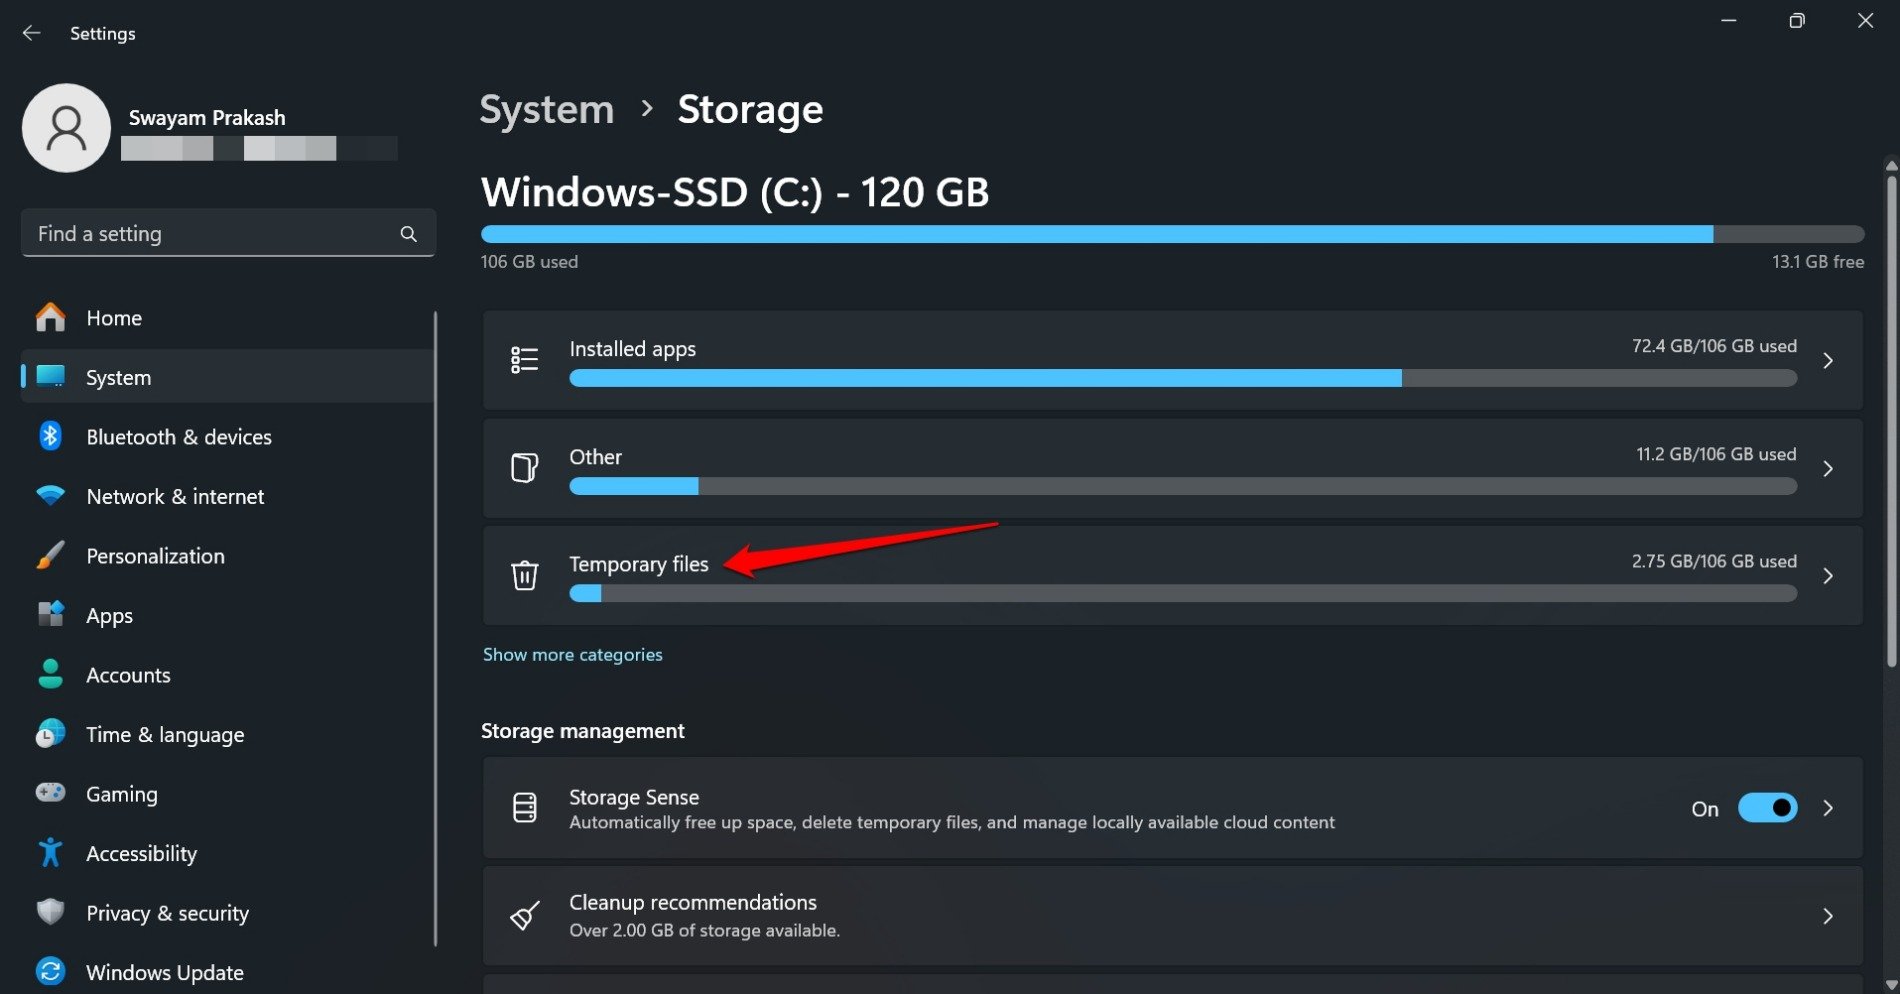
DirectX Shader Cache files are stored within the Temporary files section of Windows storage. Access it from Windows settings to clear the cached content.
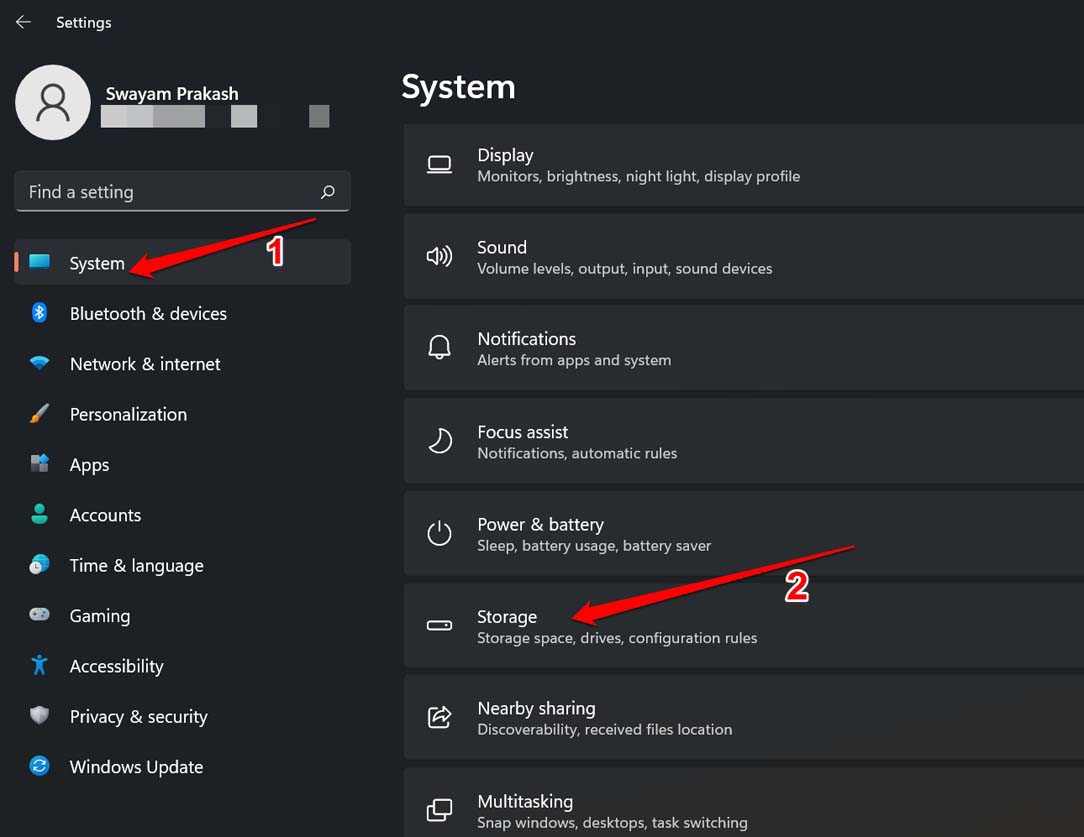
- Press Windows + I to launch the Settings app.
- Click on System> Storage.
- Access Temporary Files.
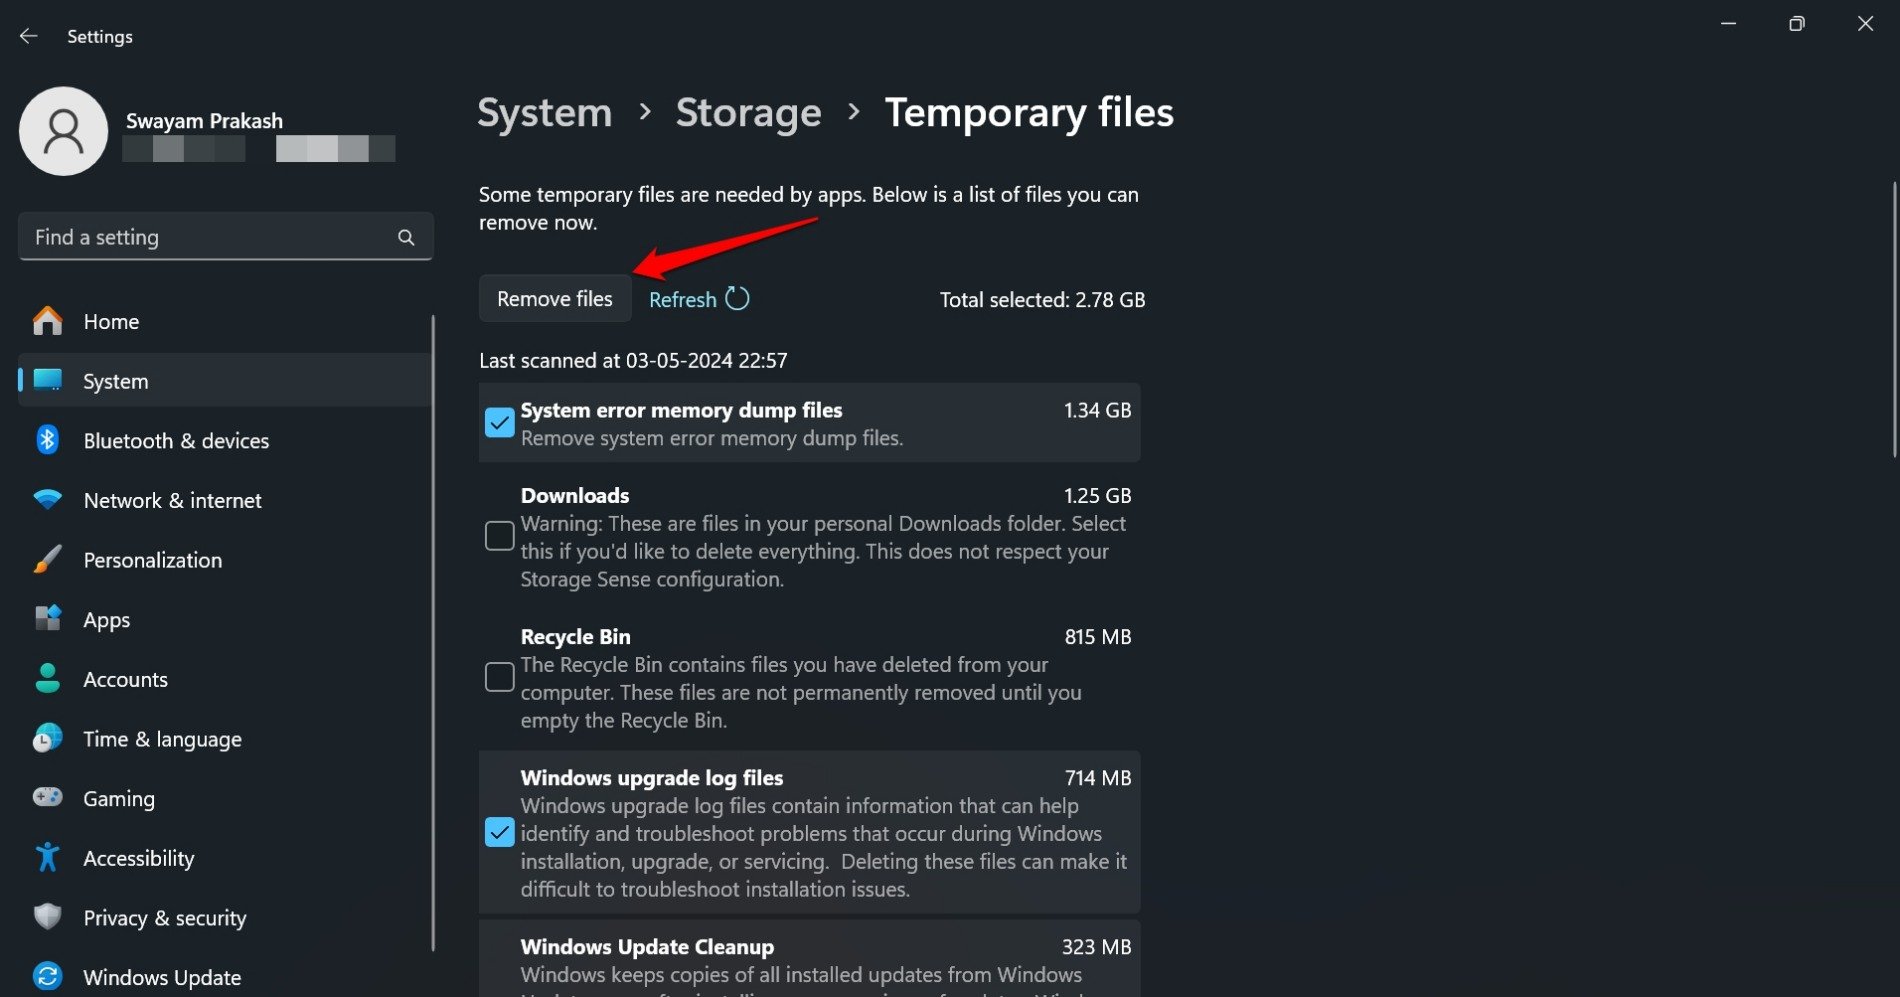
- Scroll down and click the checkbox next to DirectX Shader Cache.

- Press the Remove button at the top.
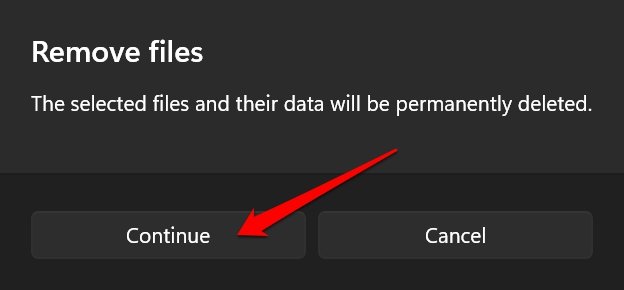
- Click Continue on the confirmation prompt.
That’s it. With the DirectX Shader Cache refreshed, restart the PC and start using apps. Now, the resource-heavy apps and games won’t stutter. They will load swiftly on Windows 11.
Remove DirectX Shader Cache Using Disk Cleanup
Windows Disk Cleanup utility needs no introduction. It is the go-to tool for removing temporary files that create junk data within the System. You can use the utility to delete the DirectX Shader Cache on Windows 11.
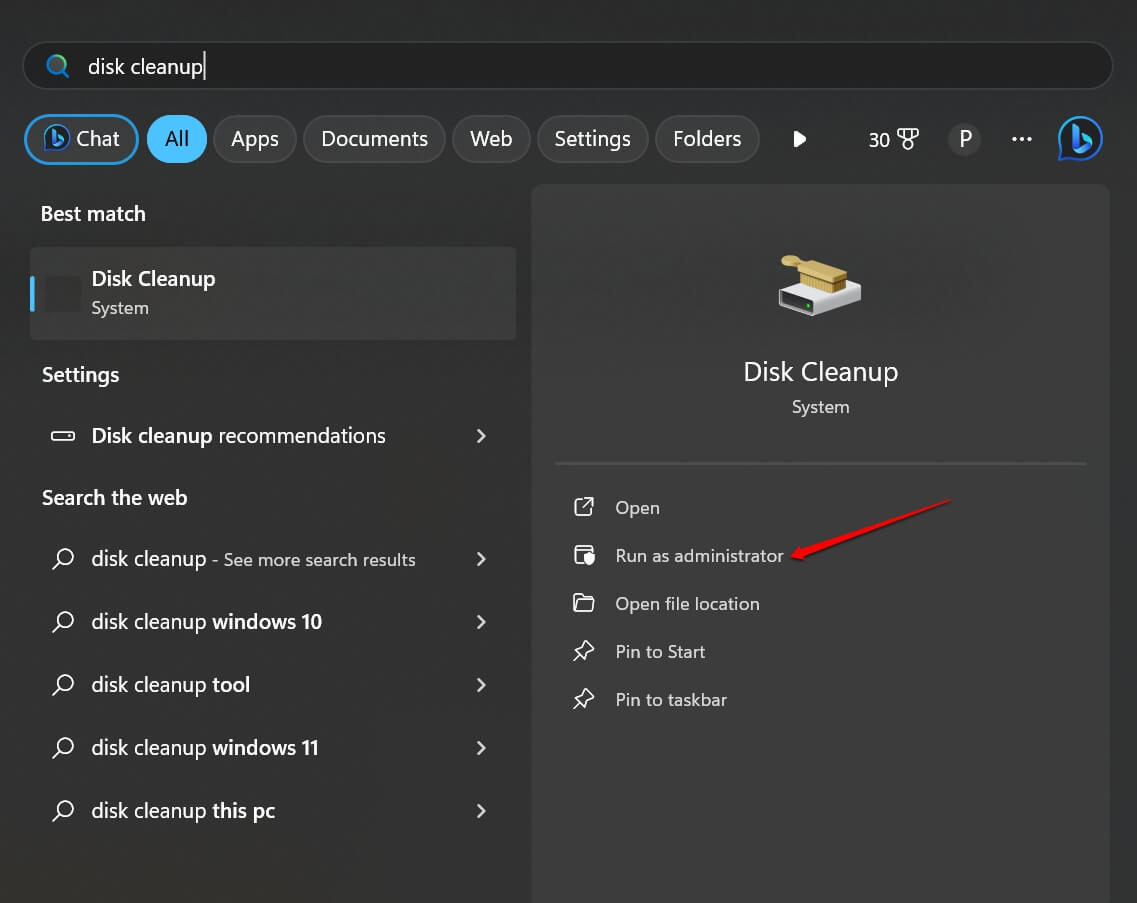
- Press Windows + S to bring up the search.
- Type Disk Cleanup and click Open when the relevant result appears on the search.
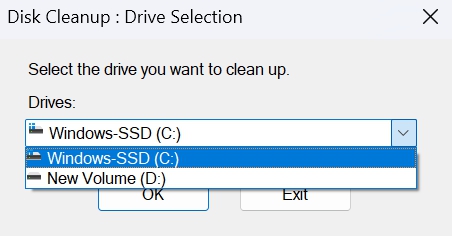
- Select the Drive by clicking the dropdown list under Drives. [Usually, the DirectX Shader Cache is within the system drive designated as C: Drive]
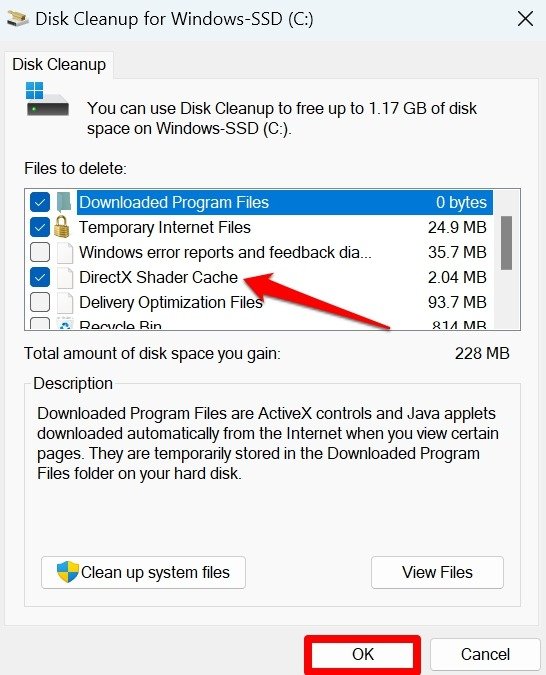
- Scroll to DirectX Shader Cache within Files to Delete and select the check box next to it.
- Click on OK.
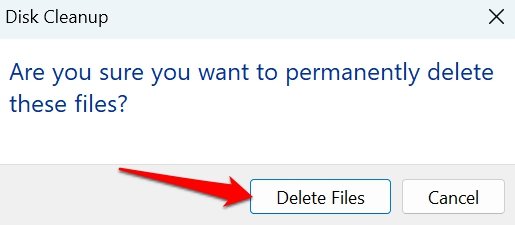
- Press the Delete Files button when the confirmation pop-up appears, asking whether you want to remove the selected files permanently.
How to Spot the Difference in Performance of Apps after Clearing the DirectX Shader Cache
You may wonder how you can tell that clearing the DirectX Shader Cache worked. Will the performance of the previously affected apps improve?
Here is the answer. After cleaning the DirectX Shader Cache, when you launch an app/game, the cache will start accumulating shaders from scratch.
As a result, loading the app may take some time. This happens only once, right after deleting the DirectX Shader Cache. During subsequent use, the apps will load and run smoothly without any lag, and the graphics element in the apps will render just fine.
You may notice this phenomenon with highly resource-demanding apps. Otherwise, it will not be noticeable with other apps that utilize the DirectX Shader Cache for better loading and performance.
Frequently Asked Question(FAQs)
Will Clearing the DirectX Shader Cache Affect the System Files?
NO. DirectX Shader Cache stores the shader files. Only those files will be cleared out. System files will remain unaffected.
Does the App Data Get Removed by Deleting the DirectX Shader Cache?
NO. App data for an app will remain unaffected after clearing the DirectX Shader Cache.
I Still Face Stuttering Issue with App Loading After Clearing DirectX Shader Cache: What to Do?
I suggest restarting your PC after deleting the DirectX Shader Cache. Otherwise, check for pending Windows OS Updates and install them. If an app exhibits sluggish loading time, install the version update that may be available.
Bottom Line
No one likes slow-loading apps and their dull performance resulting from that. Most of the time, the DirectX Shader Cache could be the culprit for this issue. Using the two methods I have described, chuck out the corrupted and redundant shader files data from the DirectX Shader Cache to vastly improve the performance of apps on Windows 11.
If you've any thoughts on How to Clear DirectX Shader Cache on Windows 11, then feel free to drop in below comment box. Also, please subscribe to our DigitBin YouTube channel for videos tutorials. Cheers!


