

Microsoft PowerPoint is a widely used application for creating professional presentations. It offers various functions that you can utilize to enhance your presentation. Adding pictures to your presentation is necessary to make the document more appealing and retain the viewer’s attention.
Many users choose to use a circle rather than a rectangle shape for the image on appropriate slides. If you want to crop an image into a circle, then this guide will help you. Here, we will show you different ways to crop a picture into a circle in PowerPoint. So, without further ado, let’s get right to it.
Best Ways to Crop a Photo Into a Circle on PowerPoint
With its built-in functions, it is quite simple to crop an image into a circle in Microsoft PowerPoint. One such helpful tool is Crop to Shape. This tool lets you crop an image into a circle, rectangle, star, square, or any other shape that you prefer for your presentation. Here we have outlined the four best ways to crop a picture into a circle that you must try on your Microsoft PowerPoint.
1. Crop Picture Using Crop to Shape Tool
Microsoft PowerPoint offers an innovative tool called “Crop to Shape.” As mentioned, this tool lets you crop a picture into a circle and your selected shape. Here’s how you can use this tool to make your picture into a circle shape in PowerPoint:
- Press the Windows key to navigate to the Windows Search Menu.
- In the search menu, type PowerPoint and click OK.

Open the PowerPoint presentation that contains the image you want to convert into a circle.
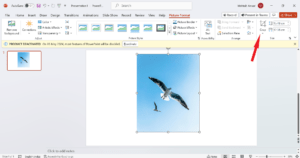
- Click on the picture at once. This will open the Picture Format tab.
- Under the Picture Format tab, click on the Crop icon on the right side of the screen.
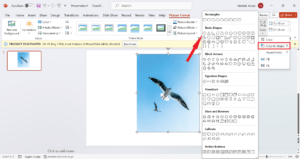
- From the context menu, select the Crop to Shape option. Now, a menu will appear with different shapes on the screen.
- Select a circle or oval shape from the shape list to make your picture into a circle.
If your original picture has the appropriate aspect ratio, it will be cropped into a perfect circle. At certain times, your picture might be oval, but you can convert it into a circle.
- To convert the picture into a circle, click on the small arrow icon under the Crop button. Then click on Aspect Ratio and select a 1:1 ratio.
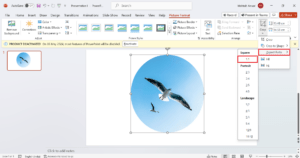
Then, move the desired portion of the picture into a circle by dragging it using the black angle bars located at its corner.
 Once you’re done with this, click on the screen anywhere outside of the picture, and it will be converted to a circle shape.
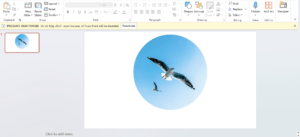
This is how you can easily crop a picture into a circle just by using the Crop to Shape tool in PowerPoint. This is the easiest way you can try out if you want to convert the picture into a circle or any individual shape.
2. Crop Image Using the Circle Shape
Another easy way to crop an image into a circle is to use the Circle shape tool. Here’s how to do it.
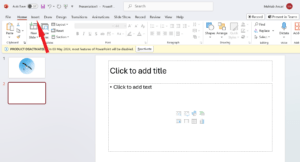
- Open the presentation or image you want to convert into a circle shape in Microsoft PowerPoint.
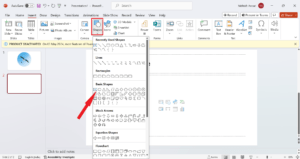
- Click on the Insert option in the top bar.
Then, click on the Shapes icon and then choose the circle or oval shape from the list.
- Drag the circle on your slide using the mouse cursor and place it.
- Click on the circle shape and select the Shape Fill option from the Shape Format tab.

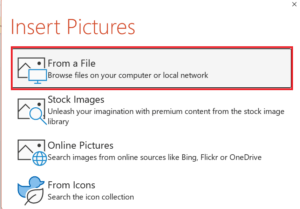
Now select Picture from and choose the image you want to convert into a circle.

Here, you will get an Insert Pictures menu on the screen. Pick the image from the desired location and import the image in your PowerPoint.
Congratulations! You have successfully created the picture into a circle.
Using the circle shape tool, your picture will turn into a circle with an outline. If you want to remove the Outline, right-click on the picture and choose Outline followed by No Outline. The black outline color will now be removed from your picture.
3. Crop Multiple Pictures Using Crop to Shape
If you want to crop multiple pictures at once, you can easily do it with the PowerPoint crop-to-shape tool. Here’s how.
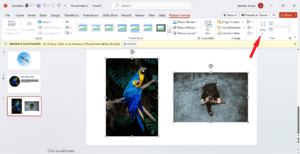
- On your Microsoft PowerPoint, try inserting the pictures more than one that you want to crop.
- Double-click on any of the pictures to select it. When you select the picture, a Picture Format option will appear on the top bar.
- Now, press and hold the Ctrl key on the keyboard and click on the other pictures.
- After selecting the multiple pictures, click on the crop option arrow icon.
 Now click on Crop to Shape and select the circle shape from the menu.
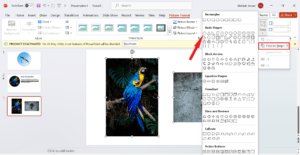
Your selected pictures will be automatically cropped into a circle or an oval. However, you can customize the shape by dragging it according to your preferences.
4. Crop Multiple Images to Circle Using a Picture Layout
Last but not least, you can use PowerPoint’s Picture Layout feature. It allows you to crop multiple images to circle and other format styles. Here’s how to do it.
- First, choose more than one picture for your PowerPoint presentation.
- Click on one of the pictures to select it.
- Then, press and hold the Ctrl key on your PC’s keyboard and select another picture.
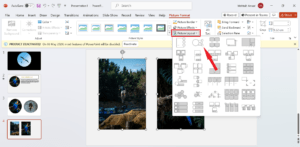
- Under the Picture Format menu, choose the Picture Layout option from the top menu.
- Select the circular shape layout from the list menu.
Here, your selected pictures will be turned into a circle. If you try to move the circular pictures, you might notice that you cannot move them to a specific range. Luckily, you can fix this with a simple process.
- Click on the picture that you’d like to move to a certain location and click on Convert in the SmartArt Design.
- Now, select Convert to Shapes.

Now you’re done with this. This is how you can crop multiple pictures into a circle with the Picture Layout feature. However, this tool is mainly utilized for creating a professional presentation in PowerPoint. Go ahead and give it a try!
Bottom Line
Designing your picture into a circle or any other shape makes your presentation more attractive. In PowerPoint, we have outlined different ways to crop a picture into a circle.
You can effortlessly crop an image into a circle by following any of the ways mentioned. You can even add multiple photos at once to crop into a circle, giving your presentation a tempting look.
If you've any thoughts on How to Crop a Picture Into a Circle in Microsoft PowerPoint, then feel free to drop in below comment box. Also, please subscribe to our DigitBin YouTube channel for videos tutorials. Cheers!


