

Dragon’s Dogma 2 is an often baffling experience that intentionally makes its systems and secrets difficult to uncover. One of the biggest offenders is the True Ending, which hides some of the game’s best, most challenging, content behind a key choice. If you’re looking to see and do everything the game has to offer, it’s definitely something you’ll want to pursue. With that, here’s how to unlock the True Ending path of Dragon’s Dogma 2.
How to Unlock the True Ending in Dragon’s Dogma 2
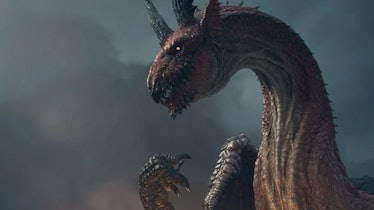
The Dragon is the final boss of Dragon’s Dogma 2, but the True Ending continues well after that.
There are three endings to Dragon’s Dogma 2: Bad, Normal, and True. The quest titled “Legacy” is where you’ll get locked into the ending of the game, so think of that as the Point of No Return, and don’t pursue the quest until you’ve done everything you want. At the same time, before we dive into the True Ending it needs to be said that you should absolutely be ready for a challenge. Make sure your character is at least at level 40, purchase the best equipment you can and upgrade it, collect tons of healing items, etc.
Now, the last step of the Legacy quest involves confronting Phaseus at Moonglint Tower. Make your way to the top of the tower and you’ll have a short battle before The Dragon swoops in and becomes your new enemy. At this point, you can get the Bad and Normal endings, and you’ll need to pursue the Normal ending to unlock the True Ending route.
- Bad Ending - The Dragon will have your “beloved” in their claws. To get this ending simply ignore them and leave the area. Pretty self-explanatory.
- Normal Ending - Attack The Dragon with any weapon. This will then transition into a sequence of you riding on the Dragon’s back, before arriving in an arena for a boss battle. Beat The Dragon by targeting its head and heart and the credits will start playing.
As the credits roll, you’ll notice you’re still playing, with your character now assuming the role of the Sovran in Vernworth’s throne room. Before you sit on the throne, however, you’ll notice the ghostly blue Pathfinder sitting at a table to the left. If you want the Normal ending simply sit on the throne, but for the True Ending talk to the Pathfinder, who’ll then teleport around the room a few times. Continue talking to the Pathfinder as he moves around the room until he says something about regretting your actions.
At this point, he’ll transport you back to the scene where you’re riding on the Dragon’s back. Grab onto the Dragon’s back and climb down his side, over to his chest, and get right on top of his glowing heart. Then open the main menu, select the Empowered Godsbane Blade and “equip” it. You’ll see a new button prompt called “Use on Self,” so select it and you’ll be treated to a huge revelation.
How to Beat the True Ending Dragon’s Dogma 2
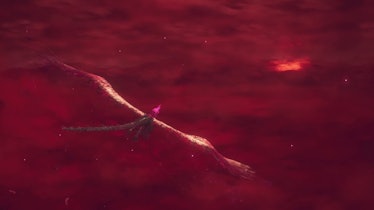
The Unmoored World is drastically more difficult, and punishing, than the main game of Dragon’s Dogma 2.
That’s right, the True Ending of Dragon’s Dogma 2 unlocks an entirely new section of the game called the Unmoored World, where the world has been ravaged by a mysterious red fog that has dried up most of the water. The very layout of the world has changed and dangerous new enemies stalk the land. On top of this, there are two vital things to understand about this route.
- Unlike the main game, if you perish you return to the start of the day, not your last save.
- The red storm will wipe entire areas off the map if you take too long, meaning you need to complete the main quest as fast as possible.
While sleeping at an inn or campsite will give you a new “day” to start from, it also means you might be running behind on tasks. Because of that, we’d recommend you try to sleep as little as possible and do everything in your power to make sure your health doesn’t reach zero. The one good thing is that Ferrystones are now much more plentiful, and even basic enemies will drop them. On top of that major towns, like the Sacred Arbor, will now have Port Crystals.
Your first step should be to head to Bakbatahl to rejoin your main Pawn, after which you’ll head to the Seafloor Shrine and talk to Rothias. At this point, you’ll learn your main objective, talk to the leaders of the various major cities, and get them to evacuate to the Seafloor Shrine. Each area will have its own quest that you’ll need to complete to get people to evacuate.
While you can do this in any order, the red storm will take out the outer edges of the world first, before making its way toward the center. This means you should focus on evacuating fringe areas first, like the Volcanic Island camp.
The other wrinkle is the red pillars of light that are marked on your map. There are four of these in total and if you use the Godsbane Blade at them, you’ll be launched into a unique challenge or boss fight. Beating these challenges will delay the red storm, giving you more time to evacuate people. Here’s the best order we found during our playthrough for completing these, which is then the order you should evacuate people:
- Volcanic Island Camp
- Sacred Arbor
- Bakbattahl
- Vernworth
After evacuating everyone, you’ll have one final objective to complete at the Seafloor Shrine, but there won’t be any boss battle left. Congratulations, you’ve officially made it through the Unmoored World.
Dragon’s Dogma 2 is available on PS5, Xbox Series X|S, and PC.
More Like This


