

Having an overview of your Windows PC’s performance is essential to avoid straining your system’s resources. Interestingly, this is possible with the help of a performance overlay feature built into your Windows 11 PC. However, Performance Overlay is not enabled by default on your Windows device, and you need to enable it explicitly to use the feature.
So, if you were wondering where to find the performance overlay feature on your system, you are at the right place! This guide has discussed the detailed steps for enabling the hidden performance overlay on your Windows 11 PC. So, without wasting any time, let’s get started.
What is Performance Overlay?
The built-in Windows 11 Performance Overlay feature allows for instantaneous system performance monitoring. This program’s many metrics are crucial for comprehending how your computer performs specific tasks. In Performance Overlay, some typical KPIs to look for are as follows:
- RAM use
- CPU use
- GPU use
- Network use
The Performance Overlay has numerous benefits, whether seen or utilized. The most important thing is getting adequate information to assist you in troubleshooting issues that cause lags or crashes on your computer.
In case you are worried about the Performance Overlay tab obscuring the PC display, you should know that the Performance Overlay taskbar doesn’t interfere with your productivity or gaming because it’s frequently translucent.
Top Ways to View Performance Overlay on PC
There are two native methods available on Windows 11 PCs to display hidden Performance overlays.
1. Show Performance Overlay using the Game Bar
The Windows 11 Game Bar (formerly Xbox Game Bar) feature allows you to record while you play games, snap photos, view real-time system performance, and more. It is more valuable because it can display VRAM utilization and FPS in games in addition to CPU, RAM, and GPU usage.
The Game Bar feature must be enabled or turned on before you can use this function. To enable the Game Bar on your Windows 11 PC, you need to follow the following steps:
- Launch the Settings app using the Windows +I shortcut.
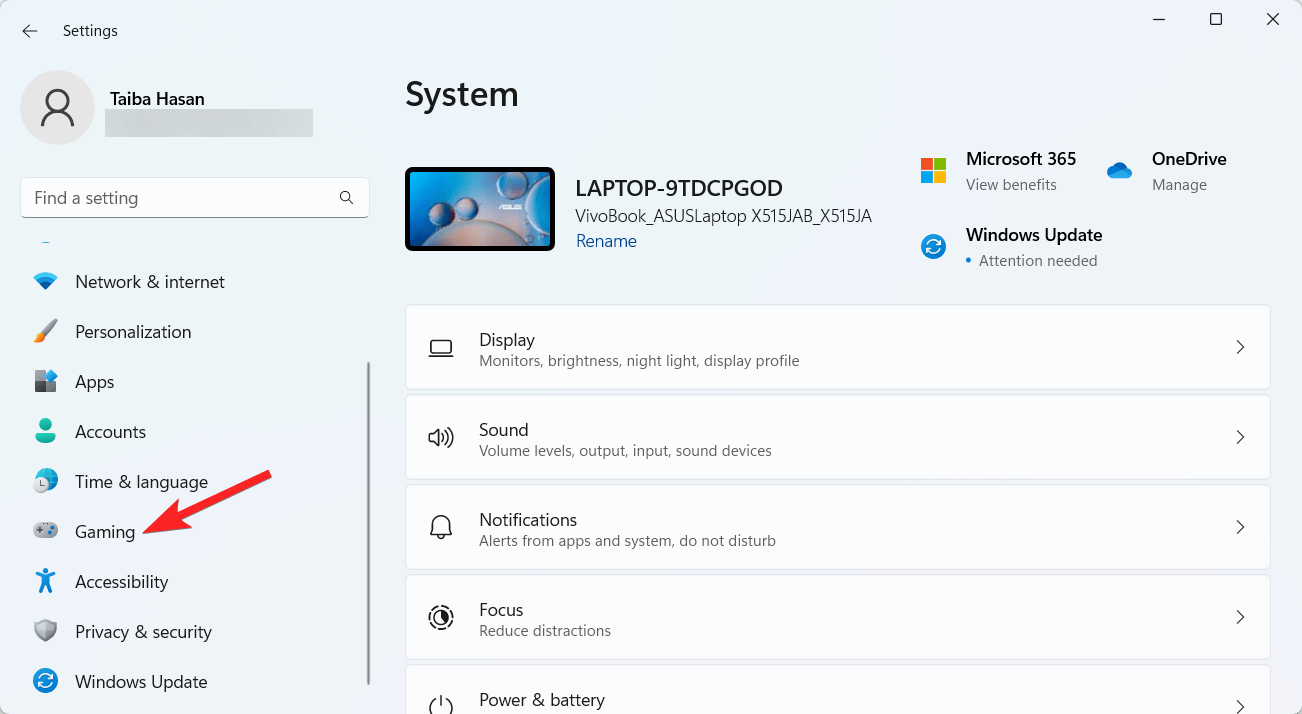
- Choose Gaming from the left sidebar.
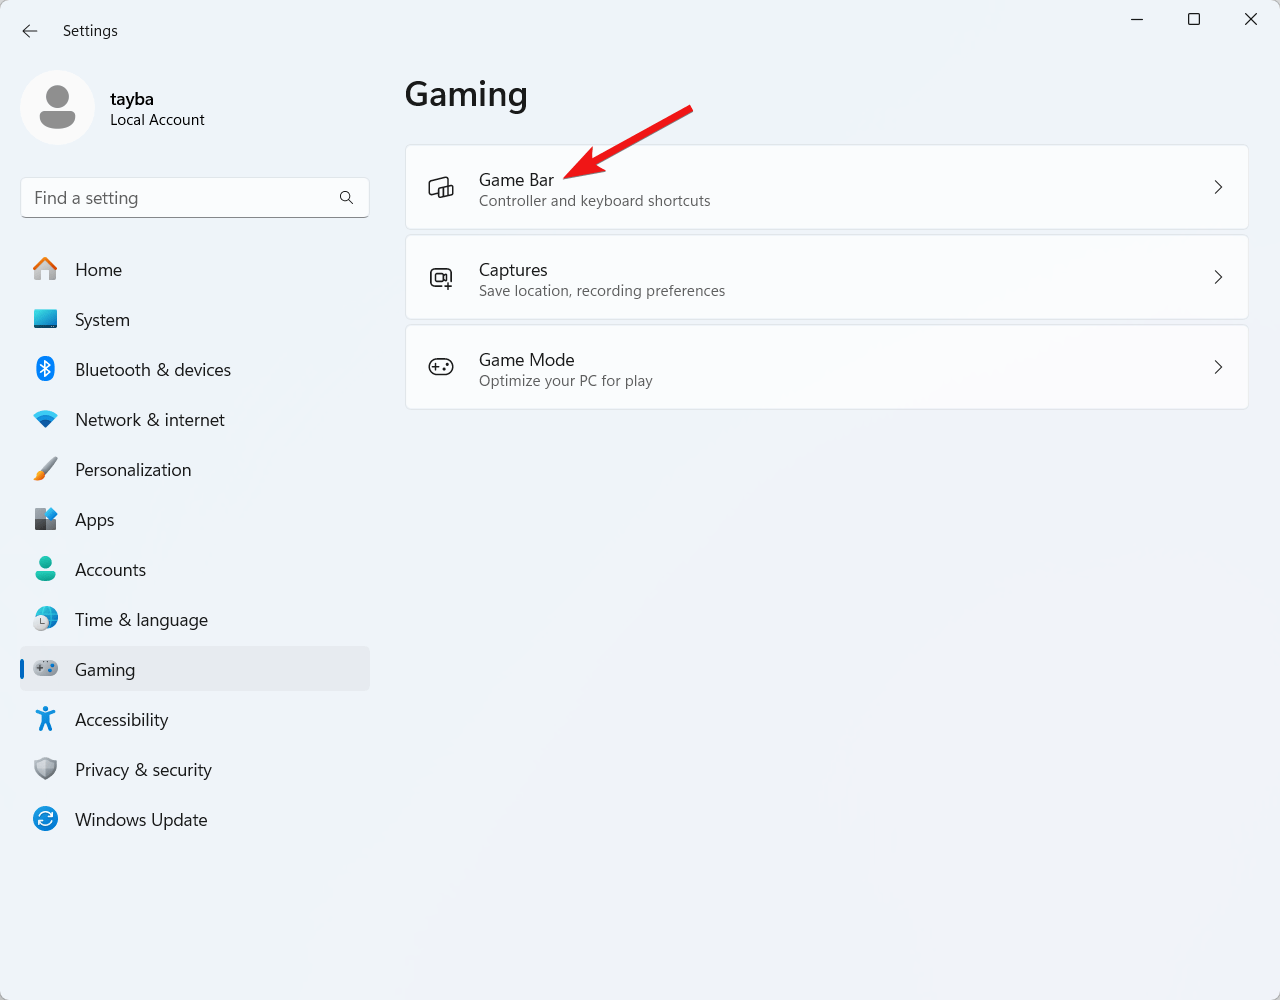
- Choose Game Bar from the right section of the settings menu.
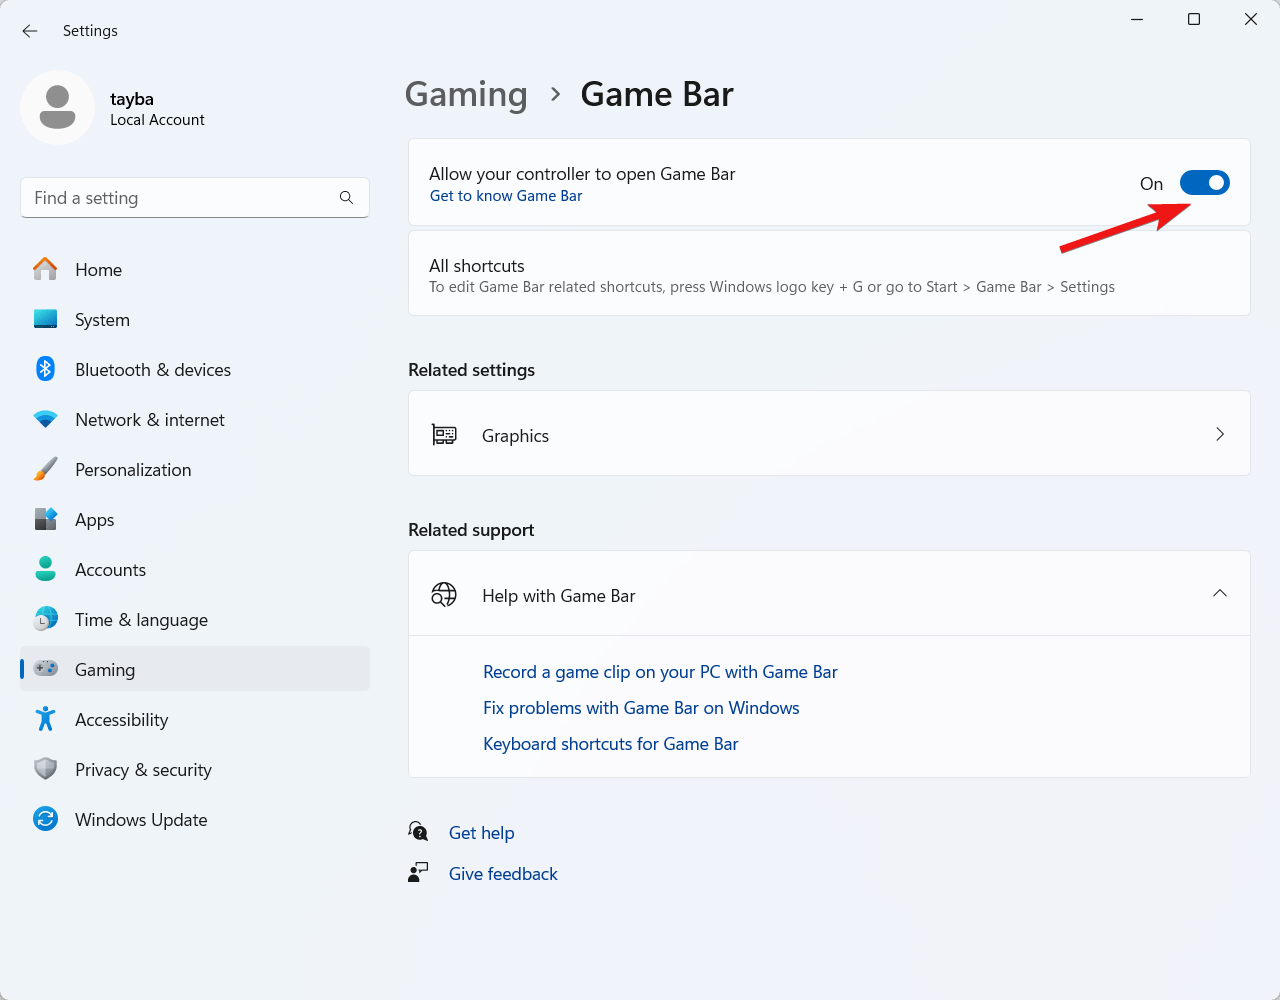
- Now turn on the toggle next to the Allow your controller to open Game Bar option.
Once the Game Bar is enabled, you should follow these steps to display the concealed Performance Overlay:
- Use the Windows +G shortcut key. Your desktop screen will then display the Game Bar feature’s Home Bar.
- In the Home Bar, choose the icon for the Performance widget in the Home Bar screen.

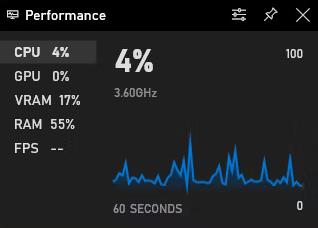
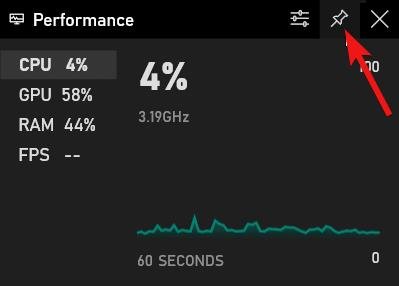
- It will open a Performance Overlay or box with CPU, GPU, and other settings displayed. Choosing an option displays a chart or graph showing its current usage.
- To customize, click the Performance Options icon in that box. The Performance Overlay now allows you to choose the graph location (Right, Bottom, or Left), accent color, and metrics (CPU, VRAM, FPS, etc.) to examine.
- Return to the Performance Overlay box once the settings have been adjusted.
- When you click the Pin button, the Performance Overlay will stay visible over other apps on your desktop, allowing you to observe the system performance. You can also conceal or collapse the chart to make Performance Overlay smaller.
- Use the Win+G hotkey, choose the Performance Overlay’s Unpin icon, and then dismiss the overlay to end it.
2. Show Hidden Performance Overlay using Task Manager
The Performance Overlay can also be shown on your PC using the Windows 11 Task Manager. It provides graphs and real-time consumption data for CPU, GPU, RAM, disk, network, and wireless connections.
Additional information is displayed for every measure. In the case of memory, it displays many aspects such as memory speed, paged or non-paged pools, cached memory, total memory used, etc. Let’s review the procedures now:
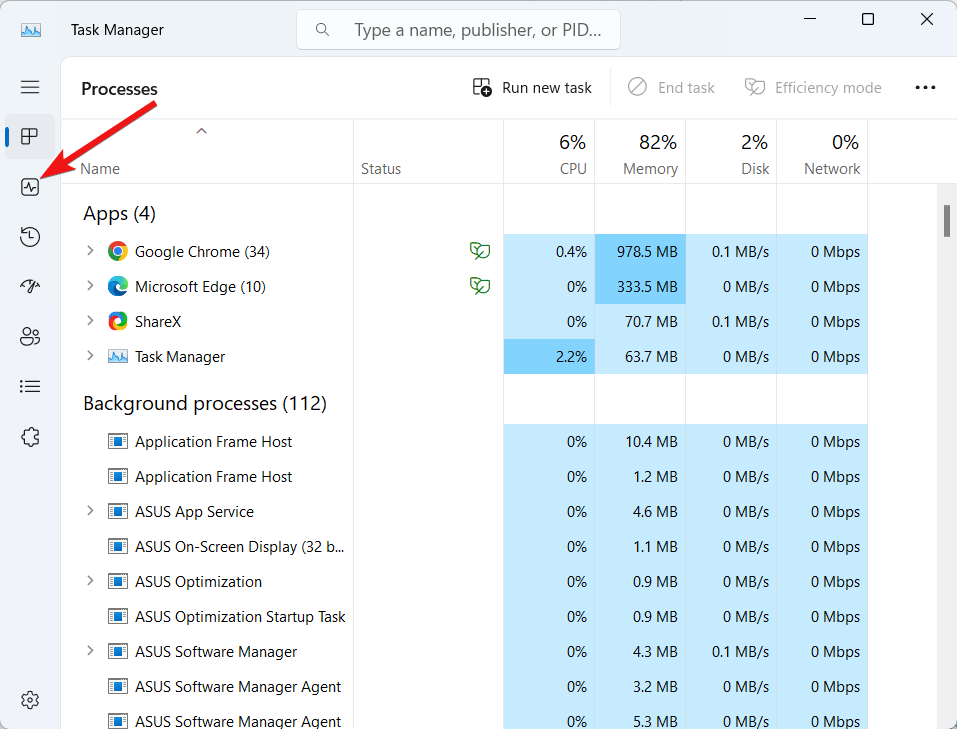
- You can use the Ctrl+Shift+Esc shortcut to open the Task Manager or right-click on the taskbar and pick Task Manager from the menu.
- Choose the Performance tab.
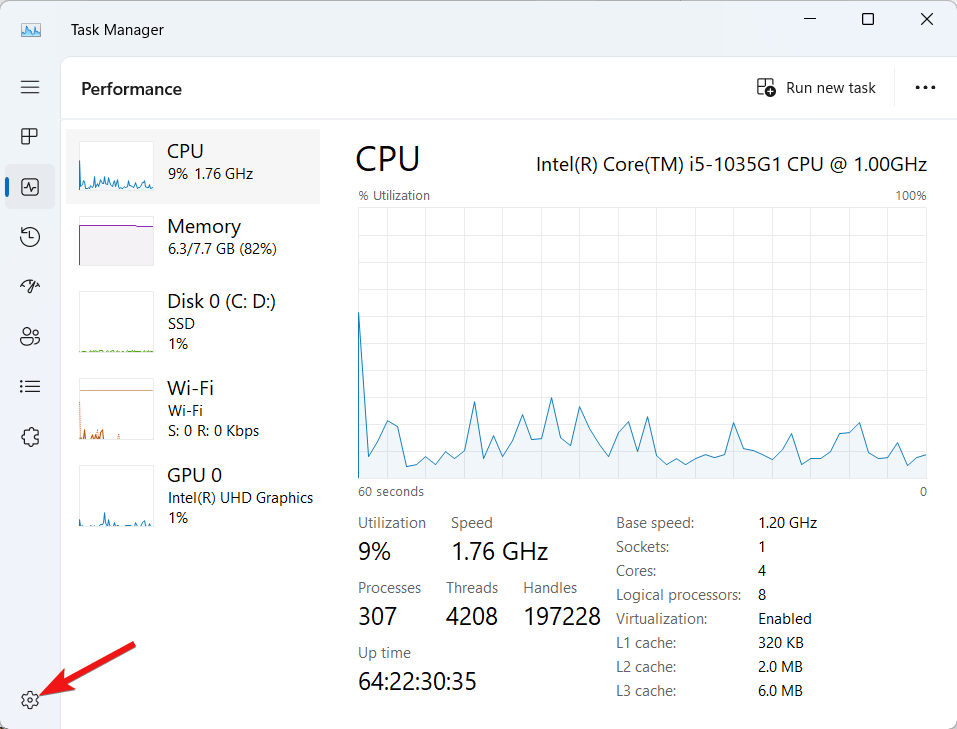
- When you click on any available metrics, the Task Manager will provide a graph and information about that specific indicator. You can right-click on any available options in Performance Overlay and choose the Summary view option to see the metrics’ summary or real-time consumption.
- Select the Settings icon from the Task Manager’s lower left corner to display the Performance Overlay.
- Extend the Window management menu under the General section and choose the Always on top option.
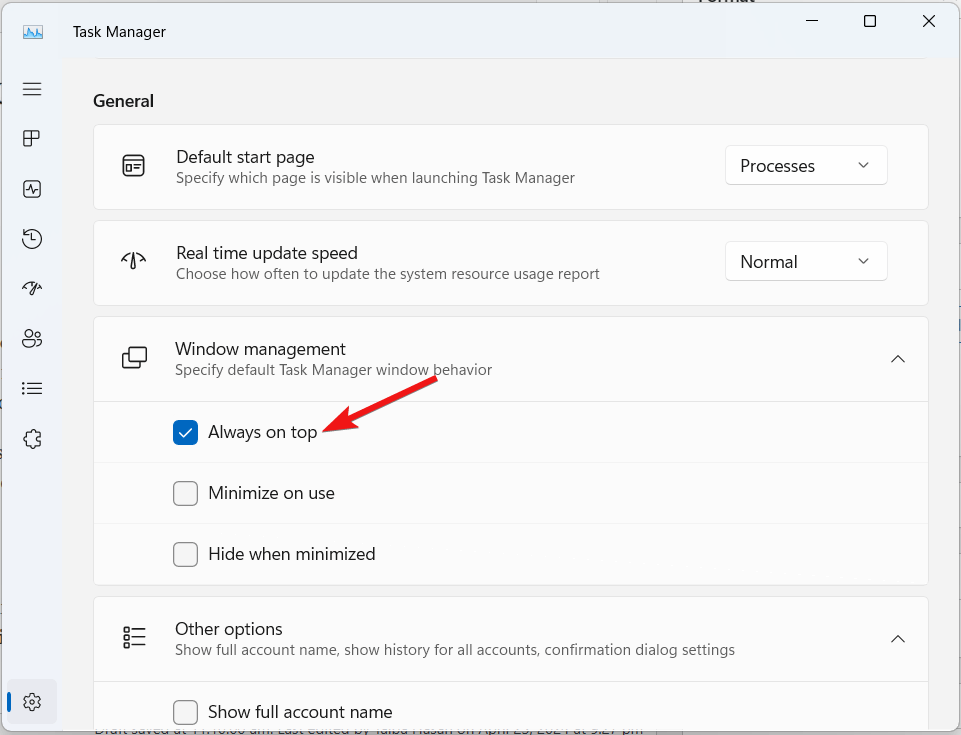
- The Task Manager window will immediately close and then reopen. Once more, choose the Performance tab.
- The Task Manager window can be resized to fit your screen and positioned anywhere on your desktop.
You can now monitor the performance measures and continue using the other software or programs. To reverse the modifications, go to the Task Manager’s Settings in the Performance Overlay and uncheck the Always on top option. Then, you can close the Task Manager.
Conclusion
If you have read this instruction, you should now be able to view your performance on the operating system. One of the best Windows 11 gaming options is Show Performance. What are your thoughts about this powerful feature of Windows 11? Do let us know in the comments section.
If you've any thoughts on How to View Hidden Performance Overlay in Windows 11, then feel free to drop in below comment box. Also, please subscribe to our DigitBin YouTube channel for videos tutorials. Cheers!


